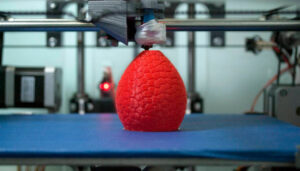
Additive manufacturing (also sometimes called rapid prototyping or 3D printing) is a manufacturing method that creates solid objects by building layers of material. Additive manufacturing follows a series of routine steps from initial CAD design to 3D printed part that you may not be aware of, so this article is for you.
In what follows we’ll take a look at the general additive manufacturing process from design to final part for those who have never 3D printed before. While there are many different 3D printing technologies, this article will focus on the general process from design to final part. And whether the final part is a rapid prototype or a final functional part, the overall process remains the same.
let’s start!
Computer Aided Design
Making a digital model is the first step in the additive manufacturing process. The most common method for making digital models is computer-aided design (CAD). There is a large range of free and professional CAD programs compatible with additive manufacturing. Reverse engineering can also be used to generate digital models from 3D scanning.
There are several design considerations that must be evaluated when designing for additive manufacturing. These typically focus on support of feature geometry constraints, or escape hole requirements, and vary by technology.
STL conversion and file manipulation
Unlike traditional manufacturing methods, a critical stage in the additive manufacturing process requires the conversion of CAD models into STL files. STL uses triangles to describe the surface of an object. Before converting a model to an STL file, several model limitations should be considered, including physical size, watertightness, and polygon count.
After the STL file is generated, the file will be imported into the slicer program. This program converts STL files into g-code. g-code is a numerical control (NC) programming language. It is used in computer-aided manufacturing (CAM) to control automated machine tools (including CNC machines and 3D printers). Slicing programs also allow designers to customize build parameters, including supports, layer heights, and part orientation.
3D printing
3D printers are often made up of many small and complex parts, so proper maintenance and calibration are critical to producing accurate prints. At this stage, printing material is also loaded into the printer. Raw materials used in additive manufacturing often have a limited shelf life and need to be handled with care. While some processes are able to recycle excess printing material, repeated use can lead to material degradation if not replaced regularly.
Most additive manufacturing machines do not need to be monitored after printing has started. The machines will follow an automated process, usually only having problems when the machine runs out of material or the software makes a mistake.
Handling of 3D printed products
With some additive manufacturing techniques, removing a print is as simple as detaching the printed part from the build platform. For other, more industrial 3D printing methods, removing the print is a highly technical process that involves extracting the print precisely while it is still encased in the build material or attached to the build plate. These methods require complex removal procedures and highly skilled machine operators as well as safety equipment and a controlled environment.
Post-processing
Post-processing procedures also vary by printer technology. SLA requires components to be cured under UV light before processing, and metal parts often require stress relief in an oven, while FDM parts can be processed immediately. Supports printed with support printing techniques are also removed in the post-processing stage. Most 3D printing materials can be sanded and other post-processing techniques (including tumbling, high-pressure air cleaning, polishing, and coloring) employed to prepare the print for end use.
Hope the above content can help you!


